
I/O Programming -Interfacing of Proximity switches and Relays
Procedure
Configuration
- Select input Pin For the sensor
- Select output Pin For for the DC Motor
- Select the Sensor Type (Inductive or Capacitive)
- Select object material
- Click on "GENERATE CODE" button to generate code
- Click on "COMPILE" button to compile code
- Click on "EXECUTE" button to execute code and goto mimic
- If you want to download code click on "DOWNLOAD" button
- The MIMIC will open on left side of screen

Simulation
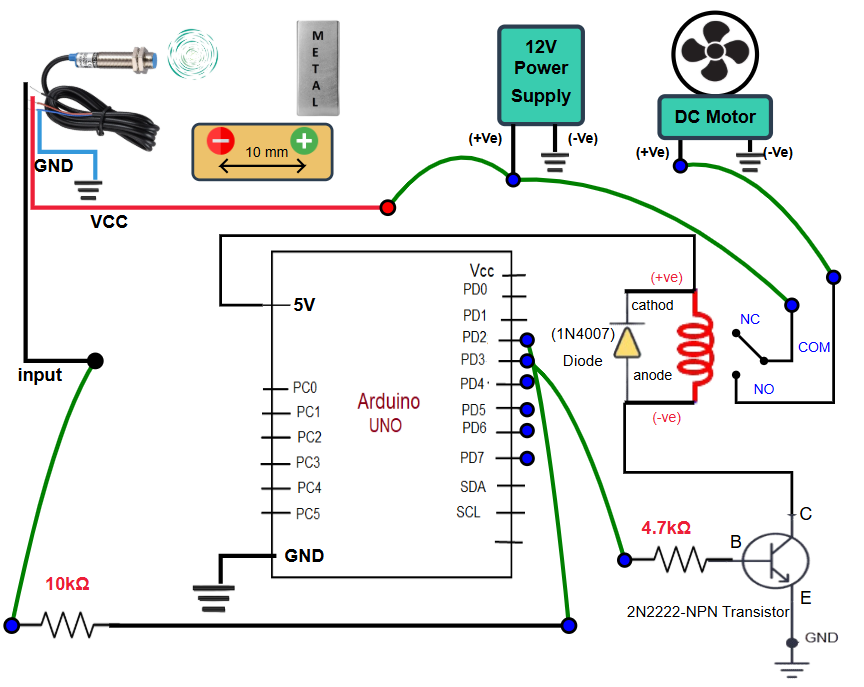
Connect the Output Pin from the Arduino to the transistor by click on the connecting points
Connect the selected Input Pin from the Arduino to the sensor by click on the connecting points
Connect the relay and DC motor according to the circuit diagram by click on the connecting points
Connect the relay and power supply according to the circuit diagram by click on the connecting points
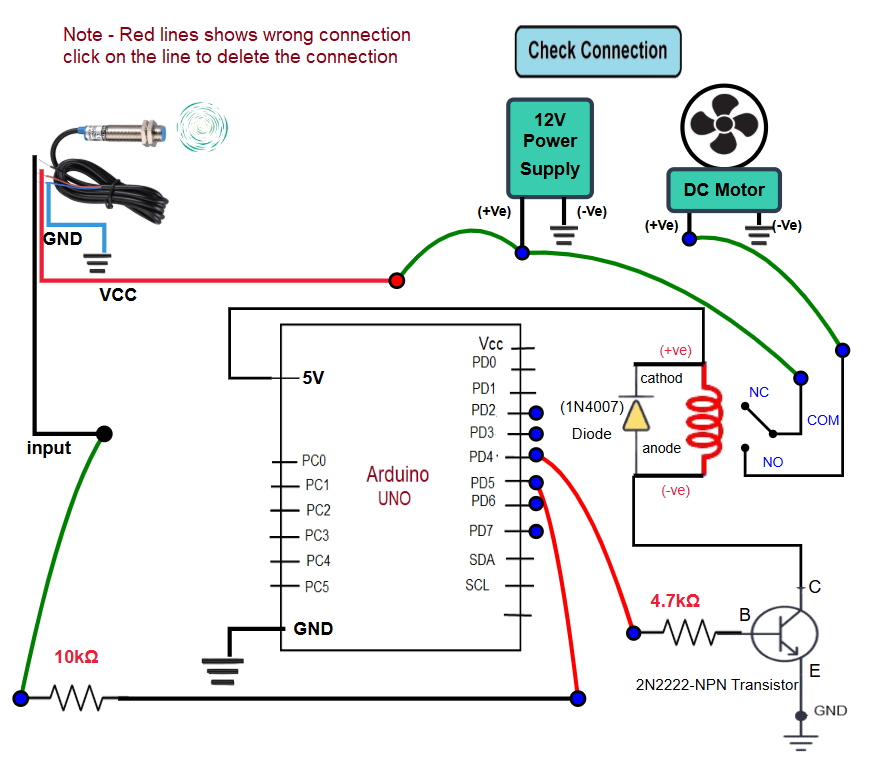
Click on "Check Connection" to validate the circuit connections
If connections are shows wrong then you can click on the particular connected line to delete the wrong connection (wrong connection shows in RED color)
After completion of circuit click on check connection object will displayed in front of sensor
Click on "Plus" and "Minus" buttons for movement the object
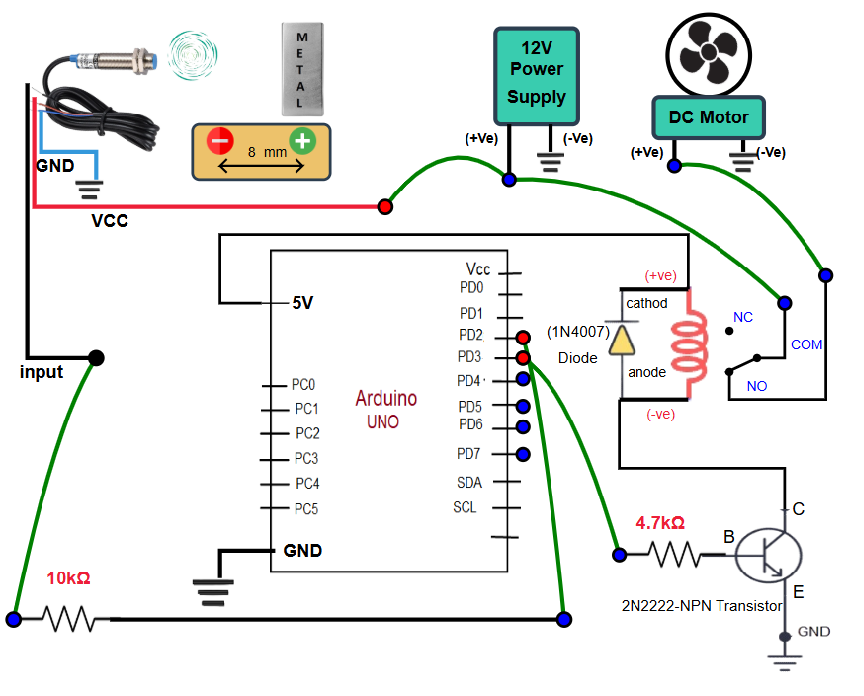
When object reached in between the sensing range of the sensor then current will flows through the circuit and motor starts running
Observe the changes in circuit and rotation of motor while changing the position of object from sensor
Click on "Next Level" button for next steps
Questions
- Read all the questions carefully and submit the answer
- After submission, verify the answers
- Click on result button, "Result" page will displayed